
Texas brisket is the best


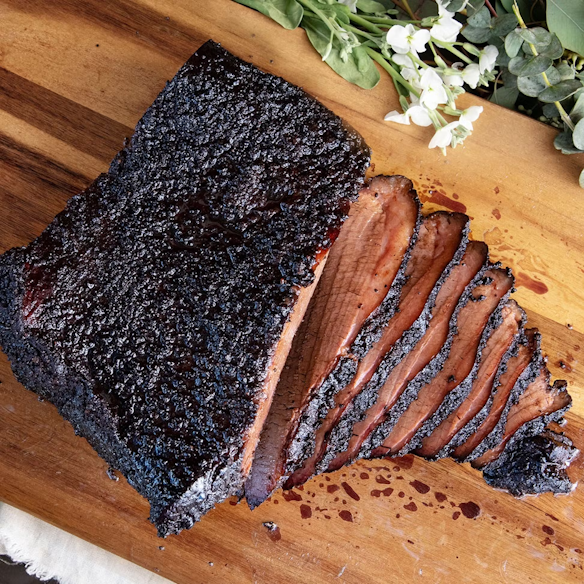
Texas brisket is the best by far.   We used a Traeger to get the perfect melt in your mouth brisket.  Notes & directions below.
  1. Trim fat the night before 
    1. Make it aerodynamic for the best bark. 
  2. The day of grilling
    1. 30 minutes out in the morning - room temp
    2. Dry it
    3. Cover with mustard
    4. Rub with salt & pepper (coarse pepper)
    5. Grill set to 225°
    6. Put brisket directly on the grill fat side up
    7. Apple cider vinegar spritz every 30 minutes
    8. Take it off the grill when the probe shows 165° internal
    9. Wrap in paper or foil.  Note: Make sure the temp probe isn't wrapped or your signal may be blocked. 
    10. Stick wrapped brisket back in the grill
    11. Take it off the grill when the probe says 203° - pull it off BUT leave probe in
    12. Let us rest until it is below 150° internally.
    13. Slice and eat 
Should be able to estimate about 1 hour/pound. This counts the resting/cooling time.  We started at 4 AM and finished the whole process by 3:45 PM on a brisket that was ~10 or 11 pounds after trimming.

This is a good video to follow for all the details, but make it your own.  


Comments

Popular posts from this blog

Z-wave Smart Switch options

Here are some of the things I found to consider when looking at purchasing Z-wave Smart Switches. What it ships with : Check what the switch comes with.  Some come with different color face plates, but more importantly, some do NOT come with a bit of wire to connect to your neutral. Protocol : Some are Z-wave, and some are Z-wave Plus.  Z-wave plus seems to mean that the switch is faster, has longer range for connectivity and usually has more features such as central scene control (means you can program double/triple tap behavior. )  Look and feel : Some look like a normal paddle switch, while others have LED lights to tell you their setting level.   Normal looking paddle switch in white with only an on/off indicator LED Paddle switch in light almond with LED dimmer level indicator LEDs Things to note :  Some switches don't support LED lights.  Check the description to avoid these.   Note the supported wattage of the switch - they...

How to install smart switches

I replaced some old dumb light switches with new smart light switches.  Note 1 :Before I go through the steps, here is a little bit of important information to know.  There may be several wires required to make the new switch connect - here is the definition of what you should see available in the housing for the switch. Smart light Switch = In my case, this is a wall light switch that has a radio that can be connected ted to a Hub for remote control or for programming on/off/dimmer based upon triggers. The protocol of the radio is z-wave in my case. Line = always hot wire - this is the source of current to the switch. Load =wire that goes to light out the other side of the switch and is only hot when the switch is turned on. Neutral =  White wire (in my house) that carries a current back to the source for the unbalanced portion of the load Ground wire = the wire that grounds the circuit. Note 2: I've only installed z-wave switches with a neutral ...

Salsa!

Here is THE salsa recipe 1 tomato (medium to large).  cut out stem area. 1 slice of red onion - 1/8" thick 3" circumference  1/2 green onion sliced long way with stem 1/2 lime juice squeezed fresh but not too hard 1/2 Serrano pepper - no seeds 1 Jalapeno - no seeds 1 small clump of cilantro - cut bottom of stems 2 garlic cloves Step 1. Put all in the ninja. Step 2. Add fresh cracked sea salt & pepper to taste Step 3. Yummmmm  :)